Thursday, 6 August 2015

Multiple Imagery - Image Bank

In the following images, multiple imagery is shown with 9 images of different things. They can be done in two different ways. The first and the third images show females who are pulling different facial expressions, within the first, you see the camera has maintained its position the entire time and therefore it is the females facial expression we are focusing on; this means that we are never shown anything other than her mouth. The third image also shows a female blowing up bubble gum, however this is different to the first as we show much more of her face. The camera also takes different positions on each of the side, which is an effective way to show the transition between the gum being blown up. Alternatively, the second and fourth image take one object and show different parts of it. For example, the tree is shown through the 9 images in a number of different parts of the tree. The fourth picture also shows a clock, however we are shown a number of different parts of the clock and therefore multiple imagery allows us to see several images as appose to just one. 


These multiple imageries are different to the ones I have previously looked at which feature a square of 9 images. The first in this shows only 4, although in each one of these images, is a technique called double exposure in which the images are two combined so multiple imagery is much more present than would seem at a first glance. I like this effect and I think it is more effecting placing the four images together to show a range, rather than just one standing alone. The final image is also my favourite, as it is completely different to the rest of it. It shows on setting which has been taken at different times of day, and therefore you can see the cool colours of the sun rising and the warm colours of it going out. 


Multiple Flash - Image Bank

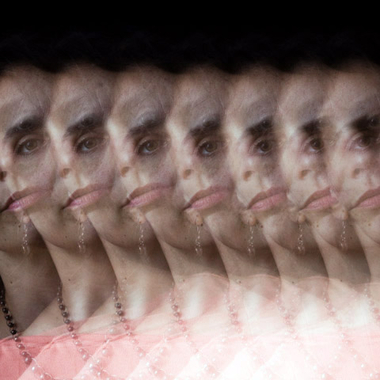
Multiple Flash is achieved by placing the camera on a long exposure and altering the flash so that it goes off several times at the press of the shutter once. This is done to achieve the following images below; due to it needing the flash, it is essential that the images are taken amongst a dark background and therefore shadows are often present. In the first image, it shows a picture of a female overlapping in the same position. Due to the intriguing way that the images are almost identical, it can be said that this image was photoshopped with the same image and then placed over one another at a lower opacity. 


In the next two images, you can see dancers who are doing different stances among a black background. You can see the dancer on the left of the image posing for the camera, and following it you can see her moving and the transition between her in the two sides of the image. In the image below that, the dancer is seen running, the transition is less than the previous one as we see the path in which the dancer followed and the blurring between each stance. Similarly, in the images below, we see someone chopping up and the way that the knife is shown in each flash before it hits the food. The transition style of these is most common in the final image where we see the deck of cards and the magician who is doing a card trick. The bold red and black colours make it stand out that he is doing a card trick, therefore it is not blurred enough so that it is not obvious. 


Location Portraiture - Image Bank

Location Portraiture is when you take photographs of people outside, instead of in a studio. This is commonly done in many fashion advertisers, as well as other campaigns to enhance portraits and make them stand out from others as they feature a range of different locations. The use of black and white in many of these images is used to enhance the formal elements of tone and create a more subtle approach, showing highlights in them. Alternatively, the use of colour makes them stand out and makes them more interesting. Many of these colours are bold, such as bright pinks and yellows. In the first image, we see a girl kissing an insect, the use of black and white enhances the effect it gives off and shows the elegance in her face. The use of minimum depth of field is shown in the background to bring the focus to her. Alternatively, in the second image, a ballet is shown with a bright pink tutu on which contrasts against the dark grey background in which she is presented. Many of the locations show females against natural landscapes such as meadows and fields. Whereas in other contexts, such as the man leaning in the city and the girl playing the guitar, the backgrounds are much more artificial, with the city being used in many of them. 


Close Up - Image Bank

In this image bank of Close Ups, they focus on a range of different parts of objects to exaggerate them and make them clearer for the viewer to see. The first two images use water droplets to close up on. The first image shows a piece of fruit, and a range of different droplets of water which are crisp and clear for the viewer. They're close up of the fruit and there is also close ups of the water droplets which are on them. The second image focuses mainly on the formal element of texture, as we can see the different lines on the leaf through the use of the formal element. However, the close up is also used to show the water droplets which is much larger than in the other image. In the background of both of the images, we can see the use of minimum depth of field which blurs out the other objects, which is a common factor in the close up images that I have studied. 


The other images in this image banks are close ups, perhaps taken with a Macro lens. The first is of a highly close up image, in which we see the inner core of a piece of fruit. The greatest level of details are present in this image, as we are shown all the different parts of the kiwi and make them appear much larger than they would be. In the second image, the sunflower is composition so that it is not central in the image, this allows us to get as close as we can to the sunflower without it losing focus and going blurry. The formal elements are much stronger through the contrasting yellow petals on the flower and the much darker centre of the image. You can also see each of the buds inside the centre, which are in depth and more present in the image. The third and fourth images are not as close up, however they are in comparison to the size of the object. For example, the cats face is a close up as the cats a much larger object in contrast to the other images in this bank. 


Minimum Depth of Field - Image Bank

Minimum Depth of Field is the amount of distance between the nearest and the farthest objects that appear in sharp focus of an image. This is done by making the objects stand out in the image, as the rest is usually blurred out. I found that those who take these images, usually take them of natural objects, such as plants or animals. The first collective group of images I found all followed similar patterns, they are both flowers and leaves and are significantly further from the background. They all use the formal elements of colour in their images, as the bold pastel colours stand out from the dark green backgrounds. The first image, shows a number of flowers which are all in different amounts of focus. The second image differs from this as although we can see the range of flowers that are in the background, only one of them is in focus. Therefore, the depth in between the flowers is much greater as we lose focus the further they go back. In the final of the three images, there is leaves instead of flowers and we also see more shadows than on the other images. 


In these images, the photographers use minimum depth of field to show off different animals in their habitat. The first image shows a fish in an aquarium, I like the use of colours in this image as there is so many in the background that brighten up the rest of the image. I also like the depth in the fish itself, where the face is the most focal part of the image and the rest of the body is blurred out, however you can still see the pattern on the fish. The second image shows a lady bird, and the reflection of it on the water, however it is much smaller and the composition is laid out so that it is less greater in the frame than the other images I have looked at. The final image is much the opposite of the second, in which the snake is mostly all in focus, and there is not a lot of the background shown in the image. 


Wide Angle - Image Bank

Wide Angle photography is pursued via the camera settings and the types of lenses used. You can still achieve wide angle images without using a specific wide angled lens, as this can be altered on the camera settings. The following images stood out to me when I was researching Wide Angle photography, one of the main reasons was the way the camera was positioned at a low angle and was looking up at particular objects, to give the appearance that they all meet at the centre. The way these photographers have achieved this is through using a Fish Eye lens, these can be bought as add ons that stick onto cameras, and give the effect of a fish bowl. I love these images, particularly with the ones that use the trees. The first image shows the formal elements of depth as we see the different tree trunks heading towards the middle of the photo, it is as if someone has taken one image and edited it to make it circular, which is an effect that can be made on Photoshop through tutorials found online. Another way you can use Wide Angle in this affect is through buildings, in which you have the building, but the rest of the objects in the photograph are directing towards the building. 


In contrast to the images above, the following images use wide angle lenses which give off the feeling that everything below is significant in response to the outer parts of the image. A wide angle lens is a term to describe one with a short focal length. In the first image, we are looking up at the traffic lights, however the proportions are hard to judge as they are much smaller in comparison to the buildings in the background. They can be compared to the other smaller traffic lights which are behind it. In the final image from this image bank, there is a landscape used which bring make the image appear natural. I love the use of the formal element colour, as there are a lot of pastel colours in it, and I also love the use of the sun on the horizon. It creates a warm feeling among the audience. 


Image within Image - Contact Sheets